Create and color-code categories
Categories group your events and set their color, for example blue for Work and orange for Family.
Find your categories
Your categories appear as colored labels under the calendar title. Click the gear icon at the end of the row to open Category Settings.

Don't see the row? Click Categories at the top right of the app. This button shows and hides the row.

Create a category
- In Category Settings, click Add category.
- Type a name. Each name can be used only once in a calendar.
- Pick a color.
- Click Save.
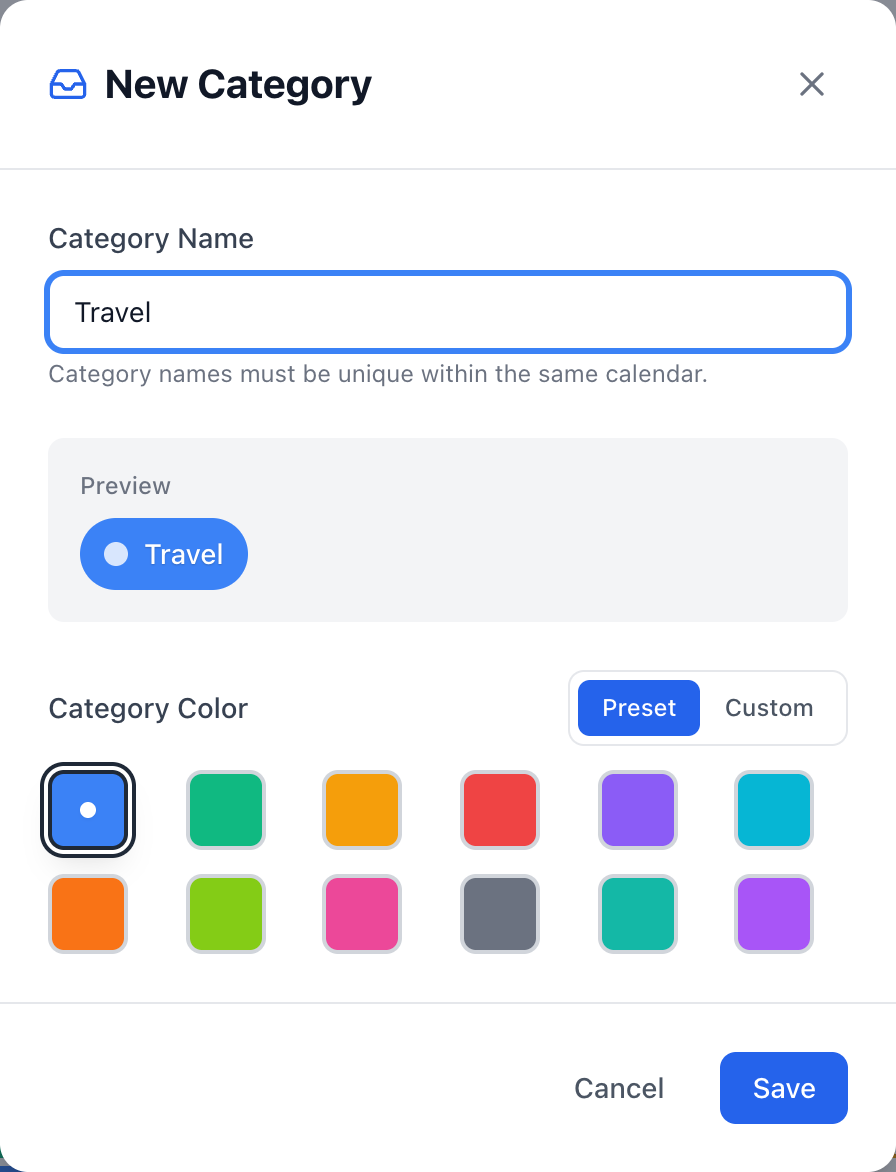
The Free plan includes up to 5 categories. Premium has no limit.
Rename or recolor a category
In Category Settings, click the pencil icon next to the category. Events in that category change to the new color.
Give an event a category
Click an event to open its panel, then choose a category from the list under the date. Each event has one category.
Show or hide a category
Click a category's label under the calendar title to hide its events. Click it again to bring them back.
Archive or delete a category
In Category Settings, click ... next to the category.
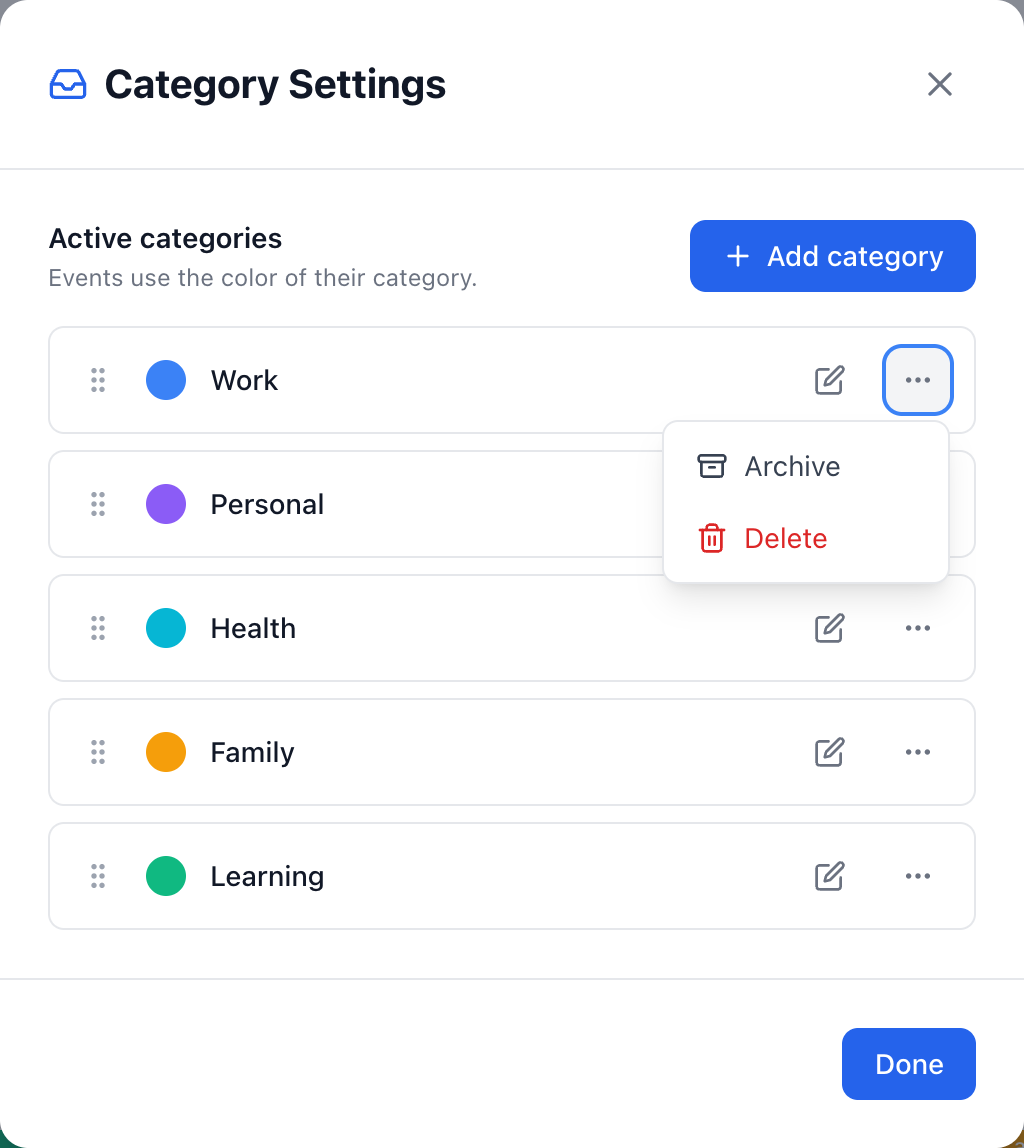
- Archive hides the category and keeps its events. You can restore it later from the Archived section.
- Delete removes the category. You choose whether to move its events to another category or delete them too.
A calendar always keeps at least one category, so these options don't appear when you have only one.
Good to know
Category colors apply to your events, not to the background of the day cells. To tint days, months or quarters, use Color Tone in Display Options, in the calendar menu.